 Maybe you already have your fishing equipment or maybe you just hopped off the train with a large pole and an even larger smile. Whatever the case may be. The proper set-up of your new equipment will translate to catching fish at Prospect Park, Central Park or any other NYC lake because the fish are definitely in there waiting. In the following post we will review a basic rod and reel, fishing line and rigging set-up that will have you wrestling with a NYC large mouth in no time.
A great way to begin this easy process is to know the basic parts of your new rod and reel. The image on the right is labeled to show the basic parts of your equipment.
1. The fishing rod may be one piece or two pieces and carries the weight of the fish and tackle during fishing.
2. The fishing reel (the right image shows a spinning reel) houses the fishing line and allows the angler (fisherman) to reel the fish in to the shore or to cast the line out.
3. The rod eyes are located along the fishing rod and serve as line holders and guides which in turn distribute the weight of the rod equally.
4. The reel bale looks like a "metal u" and surrounds the fishing spool. When pulled vertically open, the fishing line is allowed to freely come off the fishing spool. We cast (the action by which an angler throws, skips or places a bait or lure) with the reel bale always open. The bale is closed and will not allow line to freely come the spool when the "metal u" is horizontal.
5. The fishing spool holds the line on the reel.
Set Up Procedure:
a. If you rod has two pieces connect them while making sure that all the rod eyes are aligned.
 b. If your reel is not already attached to your rod, place your reel into the appropriate area found at the bottom of your rod. This place is called the reel harness. You may have to loosen the screws to make the reel fit snugly. You must tighten the screws once the reel is in place to secure the reel to your rod. You never know what you may pull up from the lake and the last thing you need is for your reel to slide out of place.
c. Now, we must place the fishing line on the spool. (If your fishing line is already on the spool, you are set for now, but still pay attention as you will eventually have to replace and restring your spool one day.) For this procedure you will need a small bucket or empty boll of water and of course your string and reel and rod. 

1. Your fishing line will more than likely come on a circle of some sort. Find the loose end of your line, open your reel bale and attach the line to your spool. I use a basic double knot; other people may use clinch not as demonstrated at http://www.thaifishingguide.com/fishtechequip/techniques/freshwatertechniques/attach_line_reel.html
No matter what you use, make sure that your line is knotted tightly to the inside of the spool. This will allow for the line to not spin while you are winding it on.
2. Once you have a tight not, drop the rest of the line into a bucket of water . Close the bale. Place the bottom of the rod between your knees or thighs. Allow one hand to loosely guide the string that's coming out of the bucket while the other hand reels (winds the cranks). Fill the spool to about a little more than half the capacity of the spool. Overfilling leads to alot of tangles when you are first learning.
 . Close the bale. Place the bottom of the rod between your knees or thighs. Allow one hand to loosely guide the string that's coming out of the bucket while the other hand reels (winds the cranks). Fill the spool to about a little more than half the capacity of the spool. Overfilling leads to alot of tangles when you are first learning.
 3. Cut the line from the water when you feel that you have enough on your spool. Open your bale. Take the new loose end and thread it through the eyes of your rod. Once you through the last eye on the tip of your rod, pull and additional foot and a half of string through. We will use this extra line to tie the hook on.
4. Now there are many ways to tie your fishing line to your hook, and there are many websites that provide tutorials on how to tie this knot. I especially am fond of Grog's animated Fishing Knots http://www.animatedknots.com/indexfishing.php because you can slowdown or speed up the learning process. Try the uni knot. It works well with all types of lines and lure. If you are having problems loading the animated page try these other fine sites:
 5. Okay, take a breather. We are almost set to hop on the bike or bus to Central park. There is just one more thing. We must rig the hook to the bait. Our hook should be a wide gap worm hook and we will be fishing with fake worms. You should know that there are many different ways to rig a plastic worm. This post will focus of one that is a little more difficult to learn but will save you headaches in the long run. We will be rigging our plastic worm to be weedless. In many NYC lakes that hold trash or other objects on the bottom of the lake, a weedless worm will not get snagged or caught much in the water because the hook will be buried in the worm itself. The following websites can explain this way better than I could, and I suggest that you check them out. Remember though, you do not need any additional equipment than what you have right now. Some sites will call for a "bullet weight" or a specialized screw hook. For now you don't need them. I caught the above bass using just a Texas rigged worm, and you can do the same. Here are the websites:
 6. And now we are done. You are set up for not only Prospect Park fishing in NYC but anywhere else, and remember as you fish from the shore that the fish are there waiting.
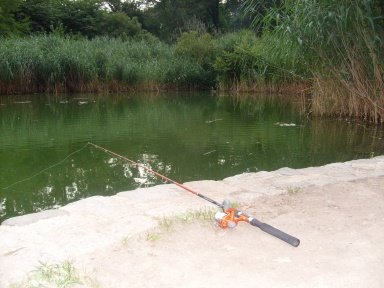


1 comment:
Nice catch Man! Would love to one day fish in New York.
Post a Comment